Create your custom iOS Framework in Xcode 12.4 with Objective-C/Swift, including CocoaPods

What is a framework and why do we use it?
A framework is a reusable set of code that is used as the building blocks of higher-level pieces of software. In iOS specifically, it is a bundle (Directory structure) that contains public headers, shared libraries as well as sub directories of headers and other resources.
The best reason to use framework is that it can be built once and be reused an infinite number of times! WORA (Write Once Run Anywhere)
How to start :
Open Xcode, start by clicking on File->New->Project from top menu. Choose Cocoa Touch Framework Option from the dialog. Write whatever name you want, here I am using MyFramework.


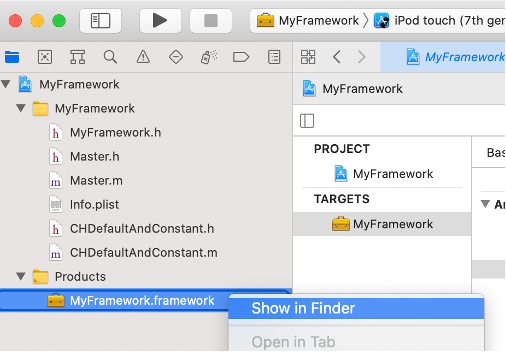
Once framework is created, you will see .framework file created in Products folder of your newly created project.

Adding Files in Framework :
Assuming you are building framework from files already in a separate app project, so you just copy those files to your framework project by dragging from Finder and dropping in your framework project. (Or you can just create new files in your project simply)

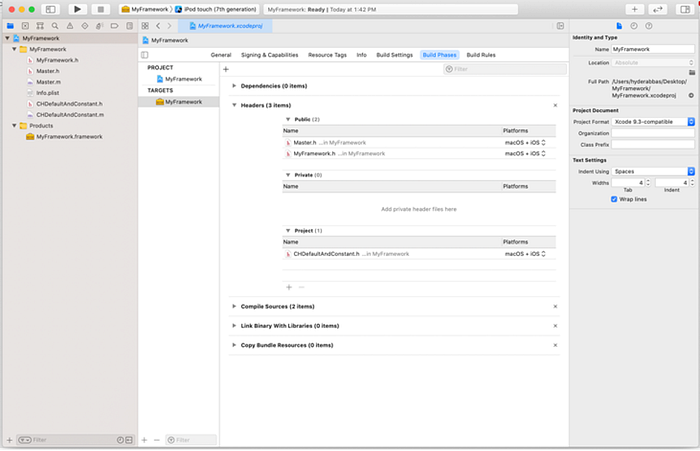
So now your project looks something like this (I added 2 files namely CHDefaultAndConstants.h and .m):

Now, since we are creating a framework, we would ideally be encapsulating the code and exposing just function definitions for the end user, therefore we need a file which would expose only those functions. Notice the MyFramework.h file XCode already built for us — That’s the file we are talking about. This file will contain all public methods we would want our users to utilise from our framework.
Now we need our framework to do something right? Maybe say Hello? Let’s create a New File (in my case I created Master.h and .m).

Add the .h file to public headers of this target (In Build Phases):
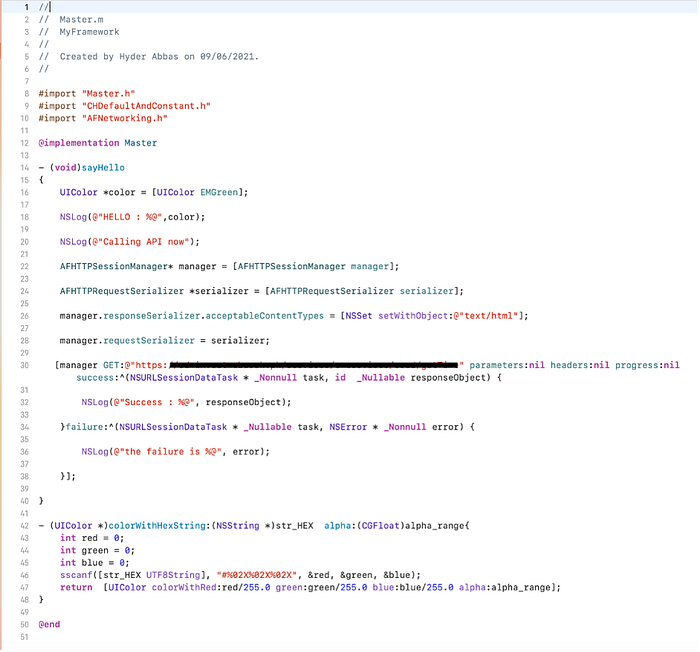
Now let’s make our framework do some work! Open Master.h file and write some code:
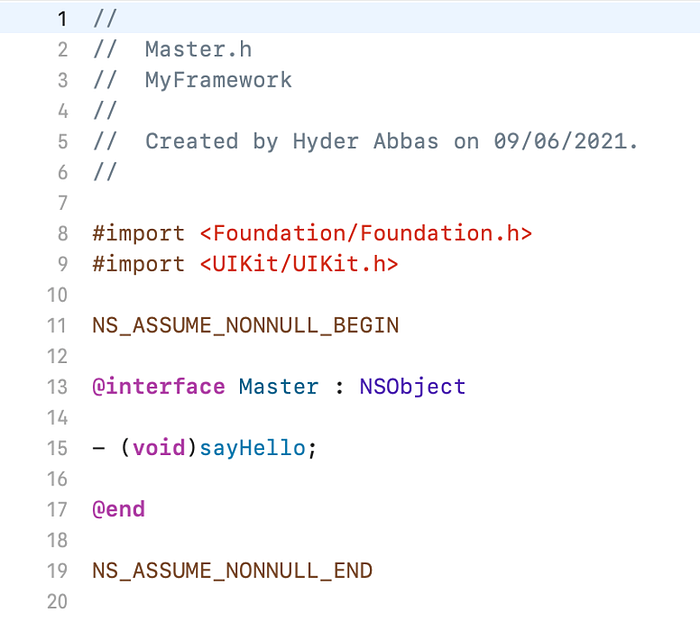
I have added a function definition sayHello. Let’s now add some implementations to this method. Open the .m file and add some code:
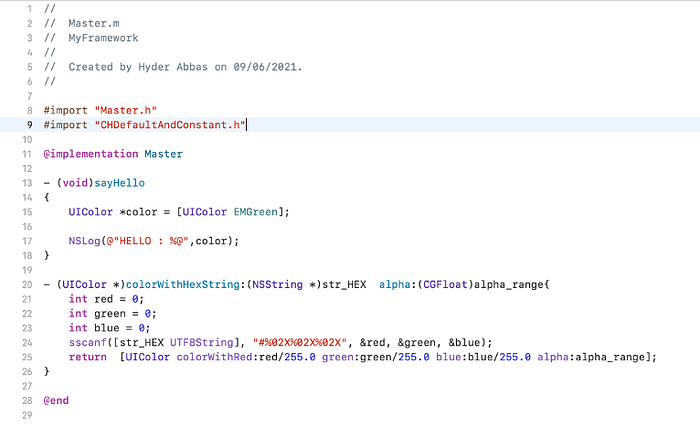
Cheers! Now your framework is ready for compilation. Even though it doesn’t really do anything more than printing a color RGB values, but hey! We created a framework successfully!
Compiling and Building the Framework :
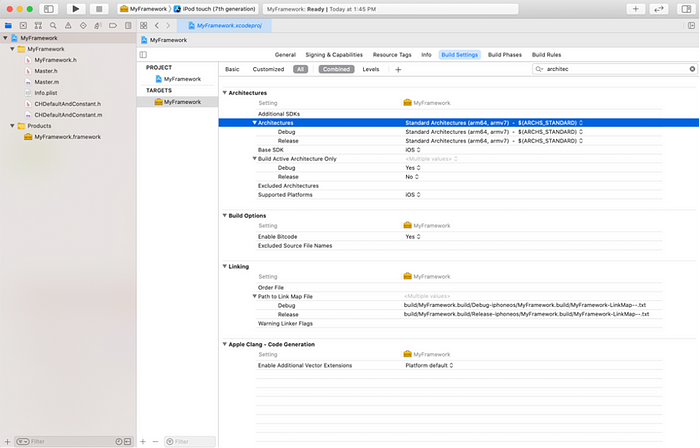
To build your framework successfully for both Simulator and Real devices such as iPhone, firstly, we need to have valid architecture settings.
Just to verify, open your framework’s .xcodeproj file, go to Build Settings tab and search for Valid Architectures setting, you will see that debug and release options already contain the values armv7, armv7s, arm64 and if not add them, these architectures are required for compatibility with real devices.
Now Build your framework on any device whether simulator or real device.
Hurray!! Now your framework is compiled and build successfully.
Finding your .framework file in Finder :
Just right-click on the framework file in Products folder and click Show in Finder.
Bang!!! there you will find your Debug-iphonesimulator folder, click on it and you will find your .framework file.

Using it in your app :
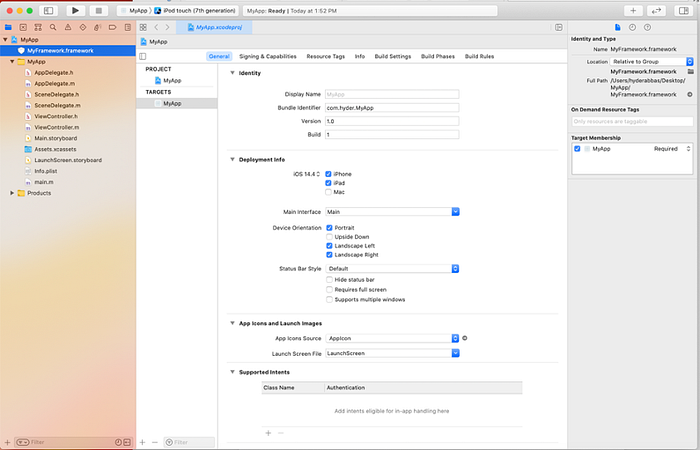
Open your app project, and just drag and drop (make sure copy items if needed is selected) the MyFramework.framework file in your app project so it looks like this:
Also make sure Embed and Sign is selected for your framework in your app target’s Frameworks, Libraries and Embedded Content section,
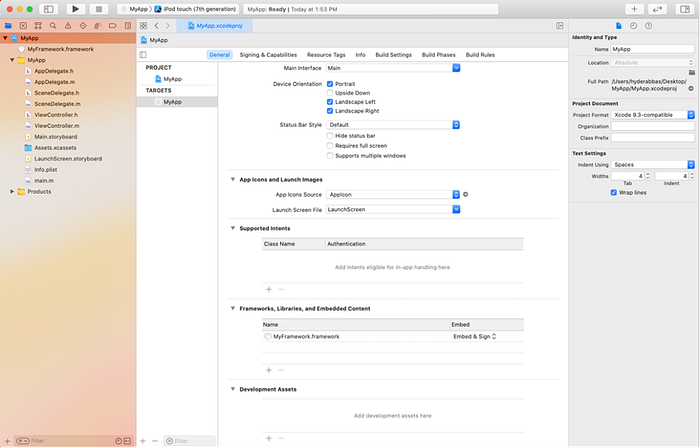
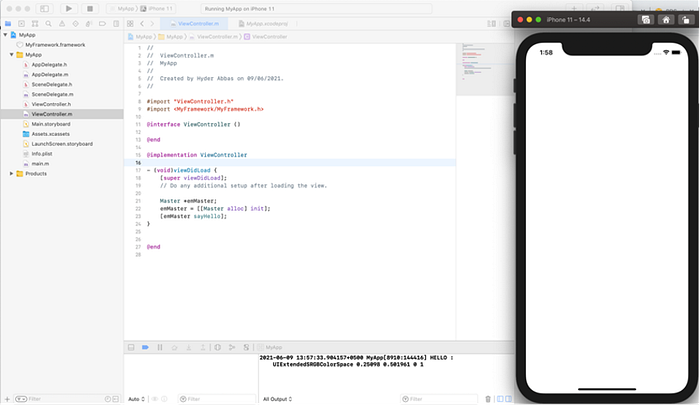
And there you are ready with your app with framework embedded in it. Just import it in your class (where you want to use it) as,
#import <MyFramework/MyFramework.h>Run your app on any simulator, it will build successfully.
Now try running on connecting with Real device like iPhone……
Wait what!! it got some errors. Some absurd errors of invalid architectures or conflicting architectures. ‘Apple Mach-O Linker error’
So what happened is, the framework we had build before was only compatible for simulator devices. Hence integrating that .framework file won’t run with real devices because that framework doesn’t support architectures required for real devices.
So turns out we have to build the framework again by selecting iOS Device this time and then again copying the newly built .framework file in our app project and again running it. But wait, then that framework file won’t run on simulator right? What do we do? Let’s create a Universal Framework that would run on both simulator and iOS devices!
An Aggregate or Universal Framework:
Open your framework project and, go to Xcode menu on top menu bar. Click on New Target. Select Other, then select Aggregate.

Name your aggregate as Universal for example. Make sure architecture settings are same as your other targets of framework.
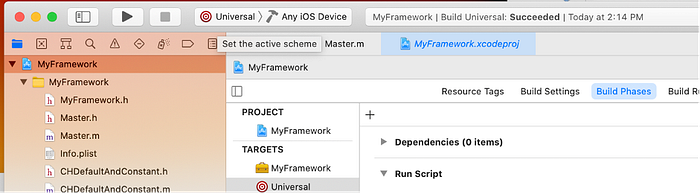
Now go to Build Phases tab in your aggregate target settings. Click on + symbol present on top menu bar. Click on Add New Run Script option.

Add following script in the Run Script:
Now build your Aggregate target. And see the magic! Finder will automatically open the folder containing new .framework file, which is compatible for all simulators as well as real devices.
Integrate it in your app using the process you used for earlier framework..
Build your app.. Aaaaannnnddd we’ll get another set errors, something like:
Building for iOS Simulator, but the linked and embedded framework ‘MyFramework.framework’ was built for iOS + iOS Simulator.Now what in the world does that mean? Hmm let’s see…
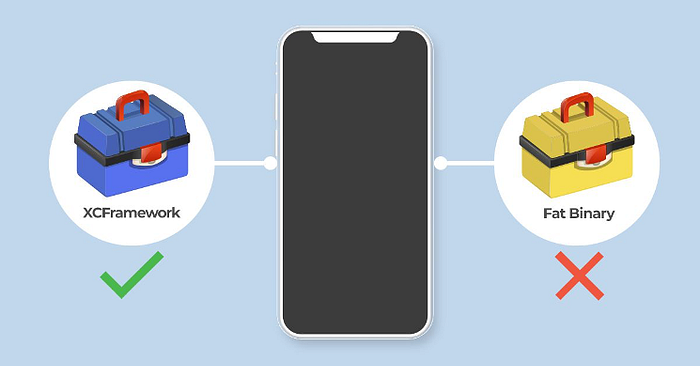
So we know what we just created is a Universal Framework (aka Fat Framework), which is simply a library/framework with multiple architectures. In our case it will contain x86 and arm architectures. But we already know that and actually did that on purpose right, so we do not have to build separate frameworks again and again for iOS Devices and Simulator.
Initially Fat frameworks worked perfectly fine but recently from Xcode 12.3 onwards, the fact that “Fat” frameworks are non supported, is enforced, as Xcode verifies the frameworks during build.
Fat frameworks, which are typically created using lipo (what our Run Script did) as they cannot be built directly by Xcode, are not supported (source: Developer Technical Support Apple Developer forum).
Now .xcframework is the only supported mechanism to ship a single framework supporting both iOS Device and the iOS simulator. (source: XCode 12 and XCFramework)
Therefore to fix the error we have, we either:
Need to create a .xcframework, rather than a Fat .framework, containing both iOS and iOS simulator slices. This also obviates the need to use a Build Phase to strip the iOS simulator slice when building for the App Store:
So the only correct way to resolve this is to rebuild the framework as an XCFramework. Which is easy to do, just run the following commands in Terminal and .xcframework will be created:
$ xcrun xcodebuild -create-xcframework \-framework /path/to/ios.framework \-framework /path/to/sim.framework \-output combined.xcframework
(source: Create an XCFramework)
OR we:
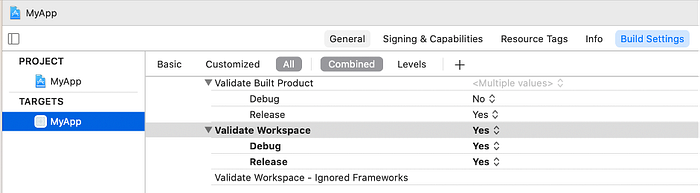
Solve this problem by simply setting Validate Workspace to Yes in the Build Settings tab of our App Target
Now build your app and it will be successfully running on both simulator devices and real devices without any error. Enjoy!!
Uploading the app with framework on App Store :
For making the successful archive for your app and uploading it to the App Store, ensure the following things to be done:
The framework we created and added in our app, includes binaries for simulator and devices. Simulator binaries are not supported on iTunes, therefore for stripping simulator binaries add following script in build phases of your app target.
Build your app now to make sure everything is working fine.
If the Run Script gives error while archiving for App Store, do the following and then submit to store:
Remove [x86_64, i386] (Simulator binaries) from the framework using below step.
1. Open Terminal and go to your framework directory
cd /Users/MAC/Desktop/MyProject/MyFramework.framework2. Run below command
lipo -remove i386 MyFramework -o MyFramework && lipo -removex86_64 MyFramework -o MyFramework
3. Now open your project again, Clean, Build & Run (On Device) and Create Archive… Happily!
Something’s missing…
We left out something that developers almost always need in their codebase; 3rd party dependencies. Now we’ll see how to integrate them into our custom framework and use the framework in your app.
How to use CocoaPods with your iOS frameworks

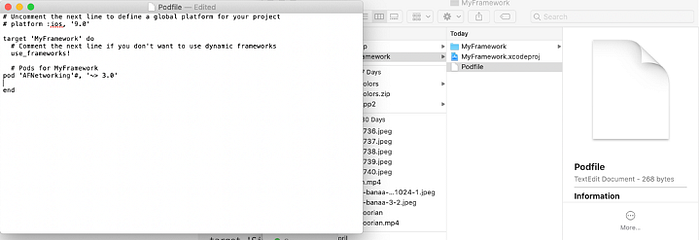
Let’s go to our project directory in Terminal and run the command pod init

This will create Podfile in our framework’s directory. Open the Podfile and add any pods of your choice in it. I added the popular “AFNetworking”
Save the Podfile and get back to Terminal and run command pod install
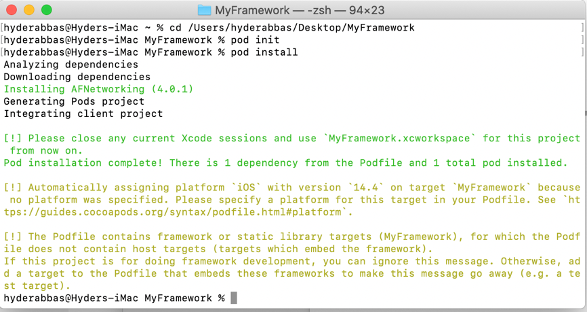
Now in your framework directory, you’ll see you have MyFramework.xcworkspace.
Open your framework .xcworkspace file and add some code in the Master.m file, importing and utilizing the newly added pod (AFNetworking in my case, which I am using to hit an API and get a response)
How cool is that!? Now our framework is actually doing something more meaningful than before i.e. utilising a 3rd party library to perform a task. A custom framework utilising another custom framework, and that too dynamically! Can’t wait to integrate this magic in our app.
Try building the framework once by selecting MyFramework Scheme (for simulator).

Once Build Succeeded, select Universal Scheme and build the framework again. After building, the finder will automatically open the .framework file for you.
Drag the framework into you own app project (MyApp in my case) again like previously we did. Make sure all process on how to copy framework in your app is followed as we mentioned earlier.
Build your app.. Aaaaannnnddd we’ll get another error! What what?!
Hang on, something’s missing… our framework file (that we imported in our app project) doesn’t contain the 3rd party library (AFNetworking in my case), but only actually contains reference to it. We actually need the library in our app project so it will act as a shared dependency between our app and our framework.
Let’s link!
What’s missing is the actual compiled Pod (AFNetworking in my case) binary that the MyFramework requests when it is loaded. This is because iOS frameworks are dynamically linked, meaning they only reference their dependencies rather than packaging them with the compiled binary image. Doing this generally reduces app size, as dependencies that are shared between binaries in the executable image (in this case, our app project) are not duplicated and instead loaded only once by the dynamic linker.
In simpler words, currently our app has no idea where to find the Pod (AFNetworking) binary because it was not packaged with either the MyFramework framework or the main app module. When XCode (dyld) loads our MyFramework , that binary is requested but cannot be found, causing the crash/error.
What we need to do is add the Pod framework to the linked binaries of the main app module. This is done by adding these lines to your Podfile of our app.
Repeat the steps to create Podfile for our app, (like we did for our framework) i.e. going to app project directory in Terminal, then pod init, then opening Podfile, adding the pod (AFNetworking), and running pod install.
Now as before, open your app workspace project (MyApp.xcworkspace in my case)
Dependencies sorted, cool! let’s build now!
Now clean the app target, and try building and running the app again. You may have to delete the app from your simulator or device if you don’t see the counter interface on startup.
P.S. If the app runs and crashes with a similar error:
Class PodsDummy_AFNetworking is implemented in both /private/var/containers/Bundle/Application/AD85D7EC-2652–4019–94FB-C799D0FBA69B/MyFrameworkExampleApp.app/Frameworks/MyFramework.framework/MyFramework (0x1019a0438) and /var/containers/Bundle/Application/AD85D7EC-2652–4019–94FB-C799D0FBA69B/MyFrameworkExampleApp.app/MyFrameworkExampleApp (0x10107c558). One of the two will be used. Which one is undefined.
Then just open your app’s Pods-[AppName].debug.xcconfig file that cocoapods creates you’ll find OTHER_LDFLAGS and you’ll see it links to the same frameworks you link in your framework. So if you remove -framework [Duplicated framework], making the line to be OTHER_LDFLAGS = $(inherited) -ObjC , the warning (it is a warning, but it actually produces crashes on runtime) disappears.
Seems to be a cocoapods error
Success! Great work, its time you give a pat on your back mate!
Thanks for reading! A special thanks to the following articles which helped me create frameworks and compile the steps for you.